Vegan Meringues

For Valentine’s Day this year I made meringue cookies.  Although I’ve made meringue for pies many times, I had never made the cute little crispy cookies.  They were a total success and my son said they were one of the best desserts I’ve ever made.  Egg whites and sugar, what’s not to love?

About a week later I decided to explore vegan meringues.  I was aware of this as a theoretical possibility, but thought it was probably harder than it appeared.  Vegan meringue is made from aquafaba.  Aquafaba refers to the liquid from cooking any dried bean or legume. Beans leach proteins and carbohydrates into the water they’re cooked in, which transforms that water into a substance rich in those nutrients and ripe for whipping.  While aquafaba can come from canned or stovetop cooked beans, most aquafaba-based recipes call for the liquid from canned chickpeas.  This is because chickpeas are supposed to have a neutral flavor and reliably consistent starch content.  Okay, let’s see if the dessert made from chickpea water really tastes the same as delicious, marshmallowy meringue from egg whites.

For this recipe all you need is one can of chickpeas, cream of tartar, sugar and vanilla.  Sounds easy enough, and this will be another opportunity to practice my piping skills.

Vegan Meringues

Recipe from The Kitchn – click through for more tips for success!

Liquid from one can of chickpeas – about 3/4 cup

1/4 teaspoon cream of tartar

1/2 cup sugar

1 teaspoon vanilla extract

Preheat the oven to 225 degrees and line 2 baking pans with parchment.

Using a stand mixer, beat the aquafaba and cream of tartar until it forms soft peaks (see photo below).  Add the vanilla.  Slowly add the sugar with the mixer running.  Mix until stiff peaks are formed.

Use a piping bag to create little swirls and shapes for the cookies.  If you don’t have a piping set, just scoop by teaspoons onto the baking sheet.  If you’re new to piping, set the bag in a tall container and fold it down so that you have both hands free to fill it.  As you can see, my piping skills need more practice.  Bake the cookies for 2 hours, then turn off the oven and leave them for another hour until totally hard and cool.

So, it looks like meringue, right?  Yes, the chickpea water whipped up beautifully and this recipe was easy.  However, it had a funky smell and it was just…. weird.  When I tasted the meringue before baking it had a salty, acidic, beanish flavor that I didn’t love.  I thought maybe it would go away during baking.  I didn’t tell my husband or son what these were made of and just let them taste the results.

They both noticed that something was different.  They couldn’t say what was different and still liked them, but frankly they just are not as good.  The texture of the finished product is a little different from egg white meringues.  These are more starchy?  I don’t know.  Vegan meringues are a cool thing to make and very easy, but why?  They make a great substitute and you probably wouldn’t notice the difference in certain applications where there’s a sauce or some other toppings.  But you know, a substitute just isn’t the same.


Tarte Tatin

Here’s a classic French recipe I’ve never made before.  I’ve seen the upside down apple tart made on cooking shows many times but never bothered to try it at home.  Yesterday I was watching my very favorite television show:  The Great British Baking Show and Mary Berry made her Tarte Tatin in the master class series.  She made it look so easy and gave several great tips for success.   I love the simplicity of the ingredients.  All you need is apples, crust, and a little sugar.

I got up off the couch and went to my best reference book for French classic recipes and techniques, Jacques Pepin’s Complete Techniques.   I used his recipe for pate brisee (pie crust) and followed his instructions for parts of the recipe and Mary Berry’s tips for other parts.  Tarte Tatin has been reinterpreted so many times it’s impossible to say what the ‘real’ or ‘original’ or even ‘the best’ technique might be.  Here’s what I did:

Tarte Tatin

1 pie crust – here’s the link to the recipe I use most often.  You could use a store bought puff pastry for this recipe.

1/3 cup white sugar

1/4 cup water

6 cups apples – sliced thin – This could be anywhere from 6-8 apples.

Preheat the oven to 400 degrees.  Get out your pie dish so it’s in arms reach.

Place the sugar and water in a saucepan over medium heat.  Do not use a non-stick pan when making caramel.  Bring to a boil and keep boiling until it turns a golden caramel color.  Pour the caramel into the pie dish and immediately swirl by tilting the pan to cover the entire bottom of the dish.  I struggled with this step because my caramel hardened too quickly in my cold pyrex dish.  Oh well, I pressed on.

Set the pie dish aside and allow the caramel to cool completely.  Meanwhile, slice the apples evenly and thinly.  Choose one or two good looking apples to use for the bottom of the pie. Place the first layer of apples on the cooled caramel in a nice design.  Remember, this will be inverted and the bottom will become the top; you want it to look pretty.  Fill the rest of the dish with the remaining apples.  It’s okay if the apples come above the top of the dish a bit because they will shrink as they cook.  Place the rolled out pastry or pie crust over the apples.  Tuck in the edges all around the dish.  Cut a small vent hole in the center of the pie.  Place in the hot oven for 45 minutes to an hour.  The crust should be golden brown.  When you take the dish out of the oven, let it cool for about 5 minutes.  To ensure a caramel top that’s not too runny, carefully hold a dish towel over the crust while you pour the juices into your caramel saucepan from earlier.  Next, invert the tarte onto a plate.  Now, add 2 Tablespoons of sugar and heat to a quick boil.  Pour this caramel sauce over the finished Tarte Tatin and serve just warm.  The finished tart was intensely apple flavored and super delicious.  The caramel is subtle and emphasizes the taste of the apples.  The crust was crisp and buttery.  Total success.


Blueberry Banana Bread

Quick breads are so easy and satisfying to make.  This recipe is a direct offshoot of my Grandmother’s Banana Bread which I blogged about in 2012.  It’s not too high in sugar and includes some healthy rolled oats and blueberries.  Please try it and let me know how it goes.  Don’t worry about exact measurements for this one, it’s practically foolproof!

Blueberry Banana Bread

1/2 cup rolled oats

1/2 cup buttermilk

1 very ripe banana

1/2 cup melted butter or coconut oil

2 eggs

1 teaspoon vanilla

3/4 cup sugar

2 cups all purpose flour

1 teaspoon baking powder

1 teaspoon baking soda

1/4 teaspoon salt

1/2 cup blueberries – fresh or frozen

3 tablespoons turbinado sugar

1/2 teaspoon cinnamon

Preheat the oven to 350 degrees and prepare the baking pan(s) with a good smear of butter; this recipe works well in three mini loaves or as muffins.

Begin by measuring the rolled oats into a bowl or jug like the one pictured.  Add the buttermilk to the oats, stir and let this combination sit while you gather and prepare the rest of the ingredients.  The buttermilk will tenderize the oats.

Melt the butter in a large mixing bowl and add the 3/4 cup sugar and the banana.  Mash the banana with a fork and mix well.  Add the eggs and vanilla and continue mixing until well combined and relatively smooth.  Now add the oats/buttermilk mixture and stir it all up.

Add the flour, salt, baking powder and baking soda to the bowl.  Begin to mix the dry ingredients in gently and then add the blueberries and continue to mix gently until just combined.

Pour the batter into prepared pan(s) and smooth out the top.  Combine the 3 Tablespoons turbinado sugar and the cinnamon in your 1/4 cup measuring cup and sprinkle this all over the top.  Turbinado sugar has larger crystals than white sugar and will give a wonderfully crunchy top.  Bake for 1 hour or until a toothpick inserted in the center comes out clean.  Let the bread cool in the pan for 10 minutes and then turn out to continue to cool.

 I couldn’t believe it when my husband said he thought it might even be better than banana bread!  The crumb is tender and moist and the crunchy top really sets it off.

Happy New Year

c2466f6f0a2544cc4c3b573b076fcb71--julia-child-quotes-julia-childsDo you make resolutions in January?  Each new year, I find myself feeling heavy and sluggish from too many holiday treats and loathe to go outdoors in the freezing temps.  Each January I feel the need to address sugar cravings and a desire to feel healthier.

I love cooking, baking, all the details, science, history and culture of food.  However, sometimes it’s all just too much and I need to take a break.  This year I’m focusing on healthy eating by cutting way back on sugar in January as part of a fresh start to a fresh new year.

If you are interested in making some changes this January, here are some links, tips and recipes I’m considering as I move forward.

Let’s think about a few things as we look at the month ahead:

  1. Whatever I choose to eat this month, I will be paying attention to what I eat, reading labels, and really thinking about how I feel.  Do I want added sugar in my sandwich bread?  How much sugar is in those kombucha drinks I love?  How much protein is in my breakfast?  Does this meal make me feel full, healthy, satisfied or tired?  Did I take the time to notice the taste and texture of my food and really enjoy it?  Have I checked the label on my almond butter to see if it has added sugar?  You get the idea…
  2. I will not be cutting back on fat.  Here’s an article about why our bodies need fat that also explains the different types and sources of fats.  My diet includes a LOT of raw nuts, extra virgin olive oil,  and avocados, as well as fresh eggs and moderate (sort of…) amounts of butter and cheese, and small amounts of bacon, and gasp… lard!(click here for more fascinating info about the king of fats)
  3. Why am I doing this?   I want to feel healthy and energetic, and I know from experience that I feel better when I eat very little sugar.  Everything from my digestion to frequency of headaches to cravings and moodiness improve when I stop mindlessly consuming sugary snacks.  We each have our own reasons for the choices we make – it’s important to know ourselves and find what is best for our own bodies.
  4. Rather than focusing on what I’m not eating, I’ll be turning my attention to what I’m adding this month such as:
    1. I plan to drink more hot tea  (unsweetened of course)
    2. I’m adding delicious fruit to my diet – I can have sweet mandarin oranges for dessert or a smoothie if I really need a treat (go to the end of this post for links to recipes)
    3. I LOVE to feel healthy, sleep well, and be happy – and eating healthy foods supports these goals
    4. I’m adding vegetables to my diet, and I’ll eat all my favorite winter veggies such as roasted carrots and cauliflower.  I’ll also make salads with lots of cheese and nuts, and make sure my fridge is stocked with things I like to eat so I don’t feel deprived.

As you know I love to bake, so here are a few recipes I’ll be revisiting this month.

It feels so good to make healthy choices about what to eat.  If you would like more tips and info about making changes to your diet, reading nutrition labels, or encouragement look for me on facebook  @ Monticello Georgia Yoga.

P.S. Am I cutting out dessert forever?  absolutely NOT!  I’ll be back with more sweet treats in a month or two.


Applesauce Muffins

This recipe was inspired by these Pistachio Chai Muffins I blogged about several years ago.  I made them again recently and decided I could do better by adding more nutrition and less sugar.

20171029_105851
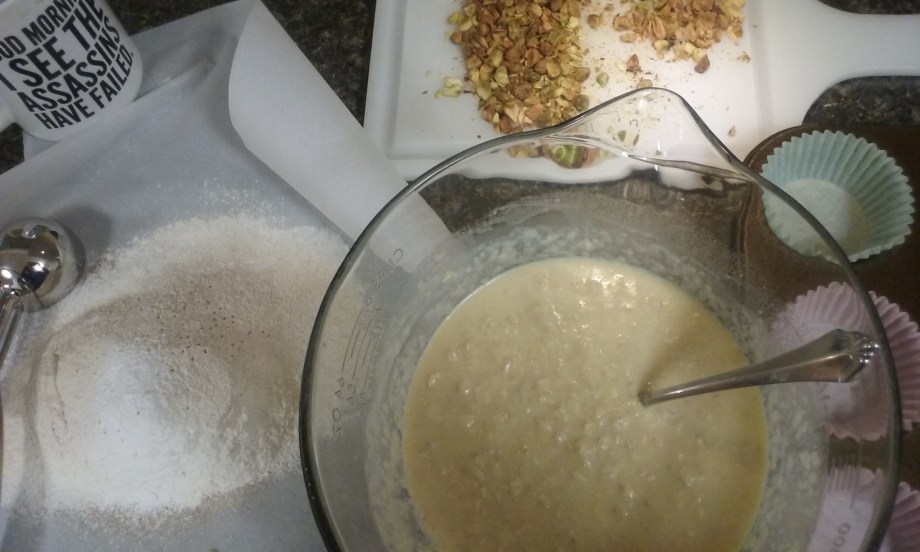
Applesauce is a great natural sweetener and also allows you to reduce the amount of fat in baked goods without sacrificing moisture.  Many recipes actually use applesauce as a replacement for butter, but that seems a bit extreme.  I also employed a favorite trick for adding rolled oats to muffins which I discovered during my first few months of blogging.  It’s well known that buttermilk is wonderful for baking, but it’s also great for tenderizing (I guess that’s why it’s good in marinades).  So if you measure out the oats and buttermilk and let them soak for a few minutes, there will be absolutely no tough fibrous texture in your baked goods.  I researched and wrote all about the wonders of buttermilk in this post.   I have since learned even more about the fascinating world of butter, cultured butter, buttermilk, and making various dairy products at home.  For example, did you know that the buttermilk we buy in the store is nothing like the buttermilk our great great grandparents made at home?  That was a by-product of cultured cream that was left in the churn overnight (that’s the ‘cultured’ part) and then churned into butter the next day.   I digress, but you can read more about buttermilk here!  One other thing I like about this recipe is that all the ingredients are easy pantry staples.  However, since I was out of chai tea bags I had to use cinnamon, cloves and ginger instead.

Onward to the recipe:

Applesauce Muffins

1 cup old fashioned rolled oats

1 cup buttermilk

1 cup unsweetened applesauce

1 egg

1 teaspoon vanilla

1/4 cup melted coconut oil or butter

1/4 cup brown sugar

1/4 cup whole wheat flour

1 cup all purpose flour

1 teaspoon baking powder

1 teaspoon baking soda

1 teaspoon cinnamon

1/2 teaspoon ground ginger

1/4 teaspoon cloves

1/4 teaspoon salt

1/4 cup chopped pistachios for the top

Preheat the oven to 375 and prepare the muffin tins.  This recipe will make 12 large or 16 skimpy muffins.

Measure the rolled oats and buttermilk into your mixing bowl first so they can soak while you get everything else ready.

Add all the wet ingredients (egg, applesauce, oil, vanilla) to the oats and buttermilk and 20171029_111058stir together.  Measure the dry ingredients and mix into the wet until just combined.  It’s a good idea to sift the dry ingredients together to remove any lumps and incorporate the leaveners into the flour, but not entirely necessary for this recipe.

20171029_111547  20171029_112239

20171105_134134

Scoop the batter into muffin tins and top with chopped pistachios.  Bake for about 25 minutes, or until a toothpick inserted in the center comes out clean.  Let cool in pans for 5 minutes, then remove to cool a bit more before eating.

My son and husband agreed that this new recipe is superior because these muffins are very moist and yummy.