Apple Sharlotka

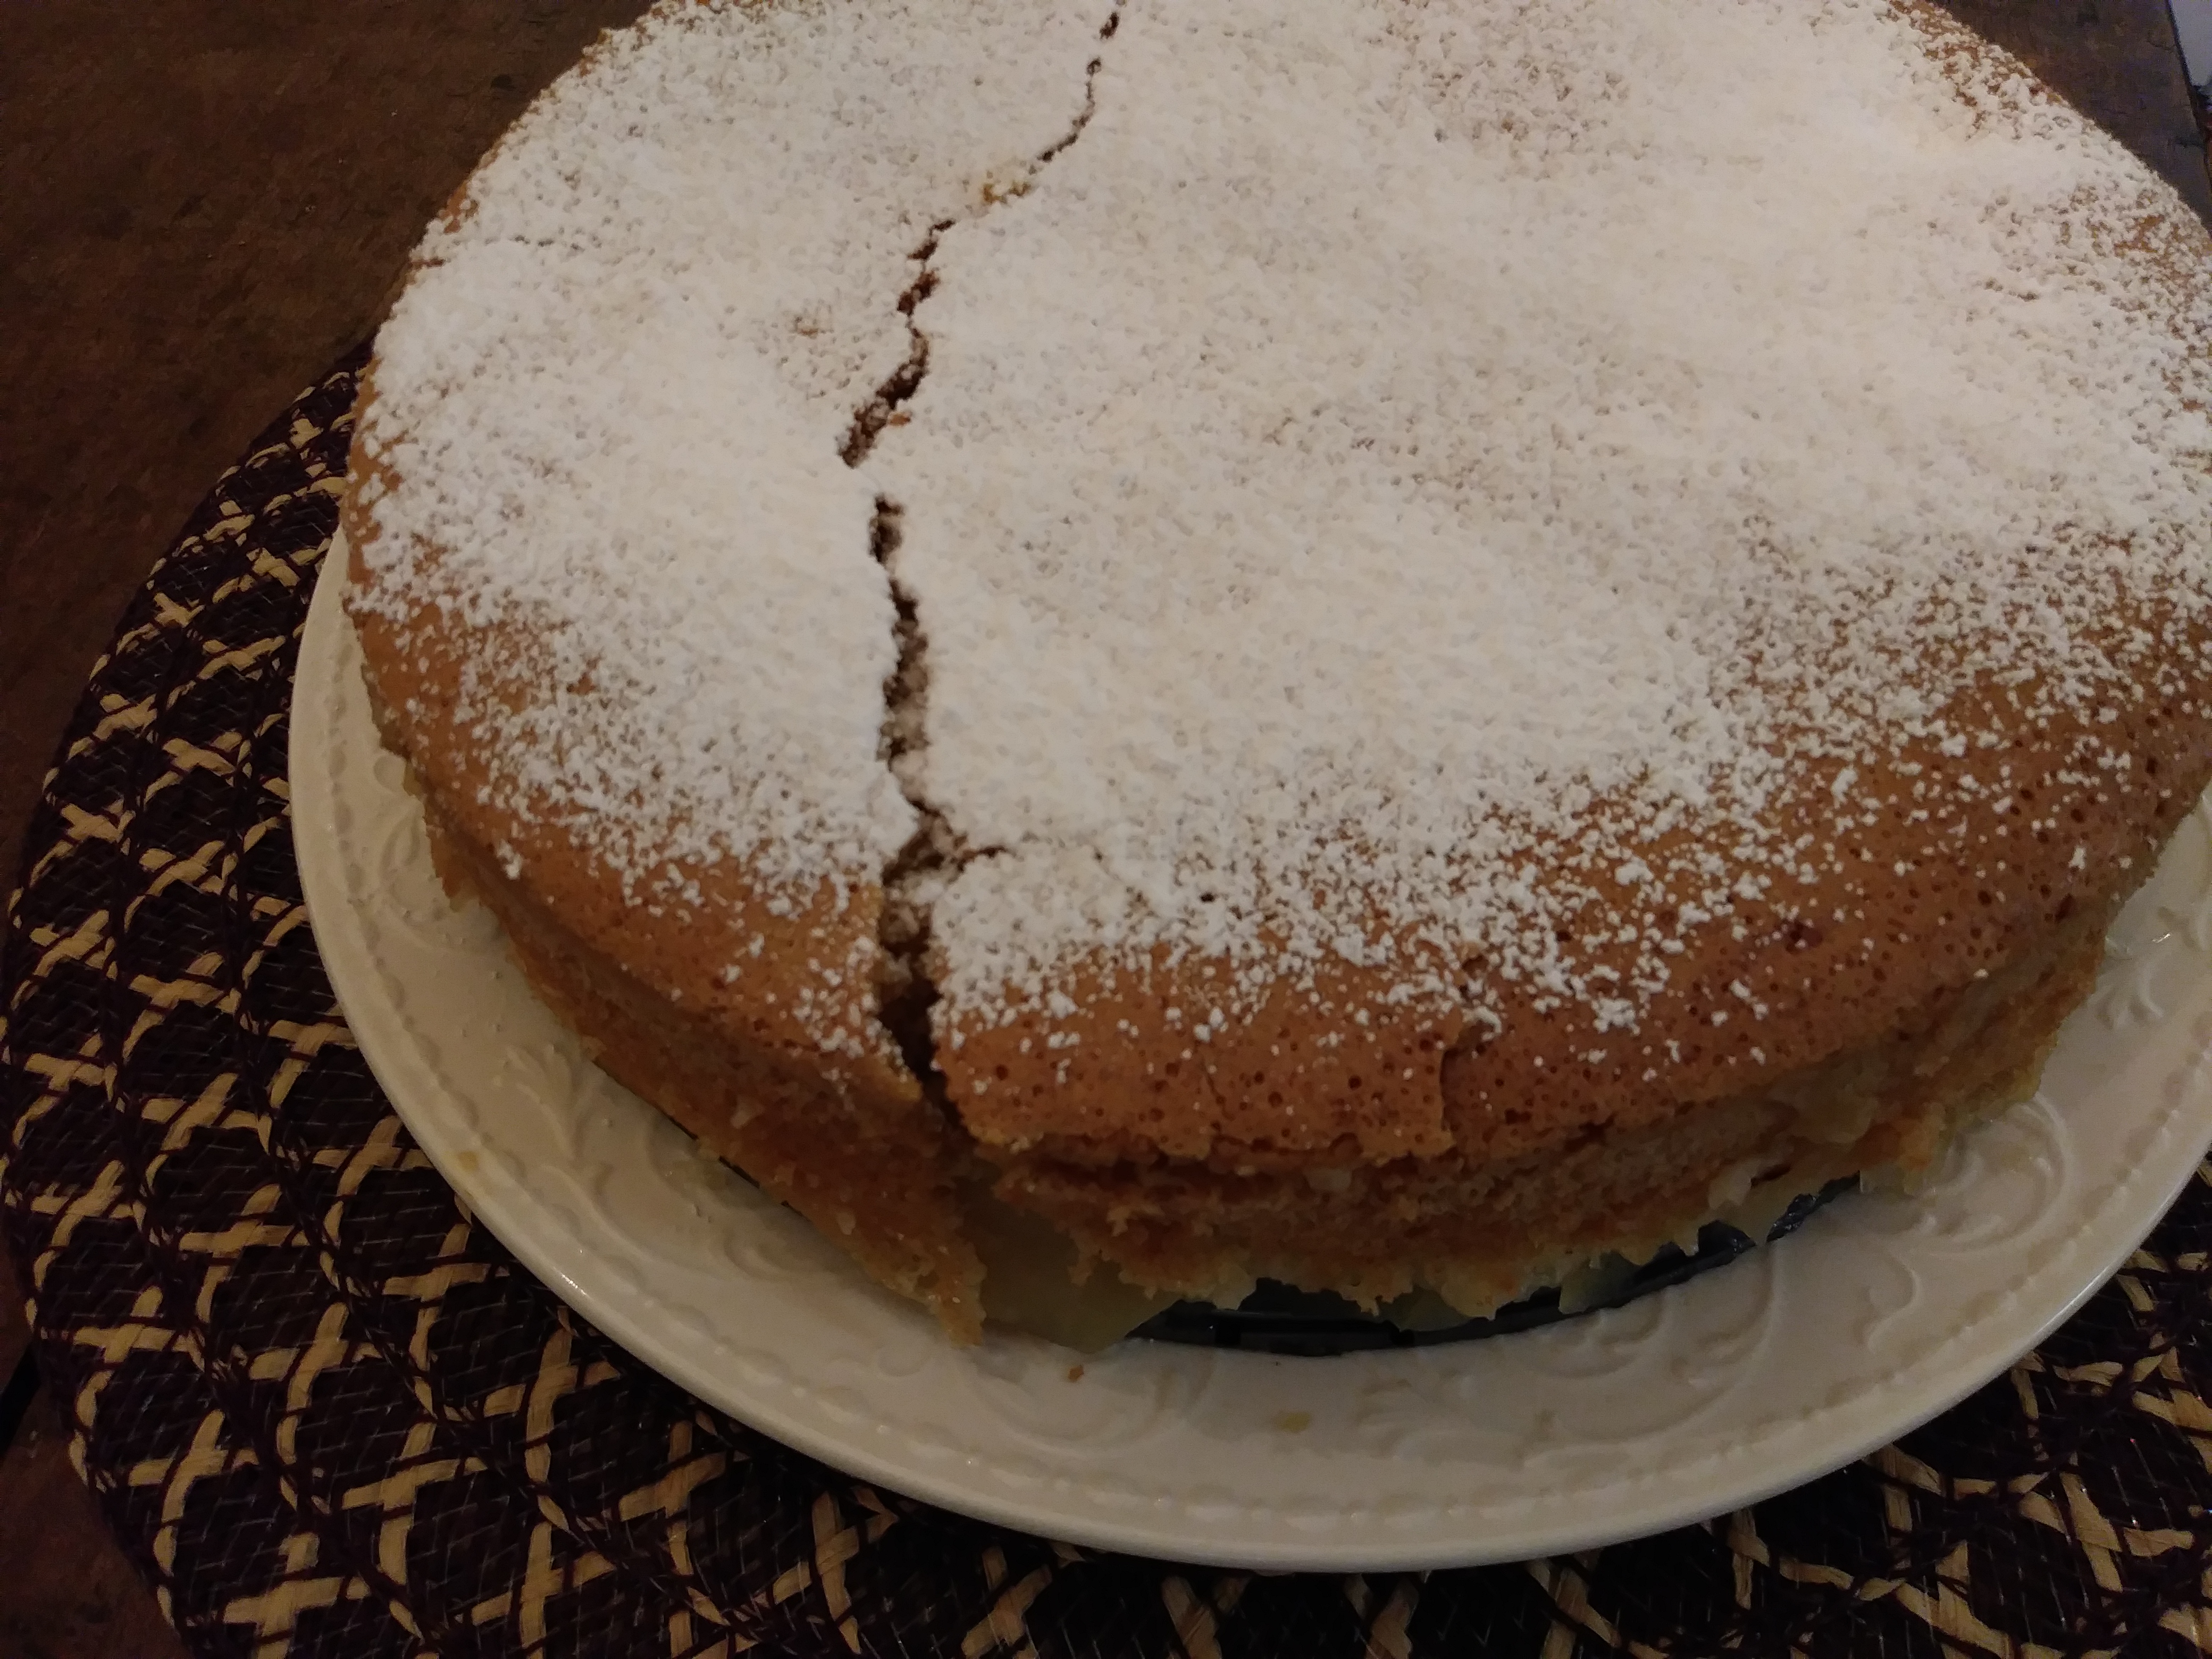
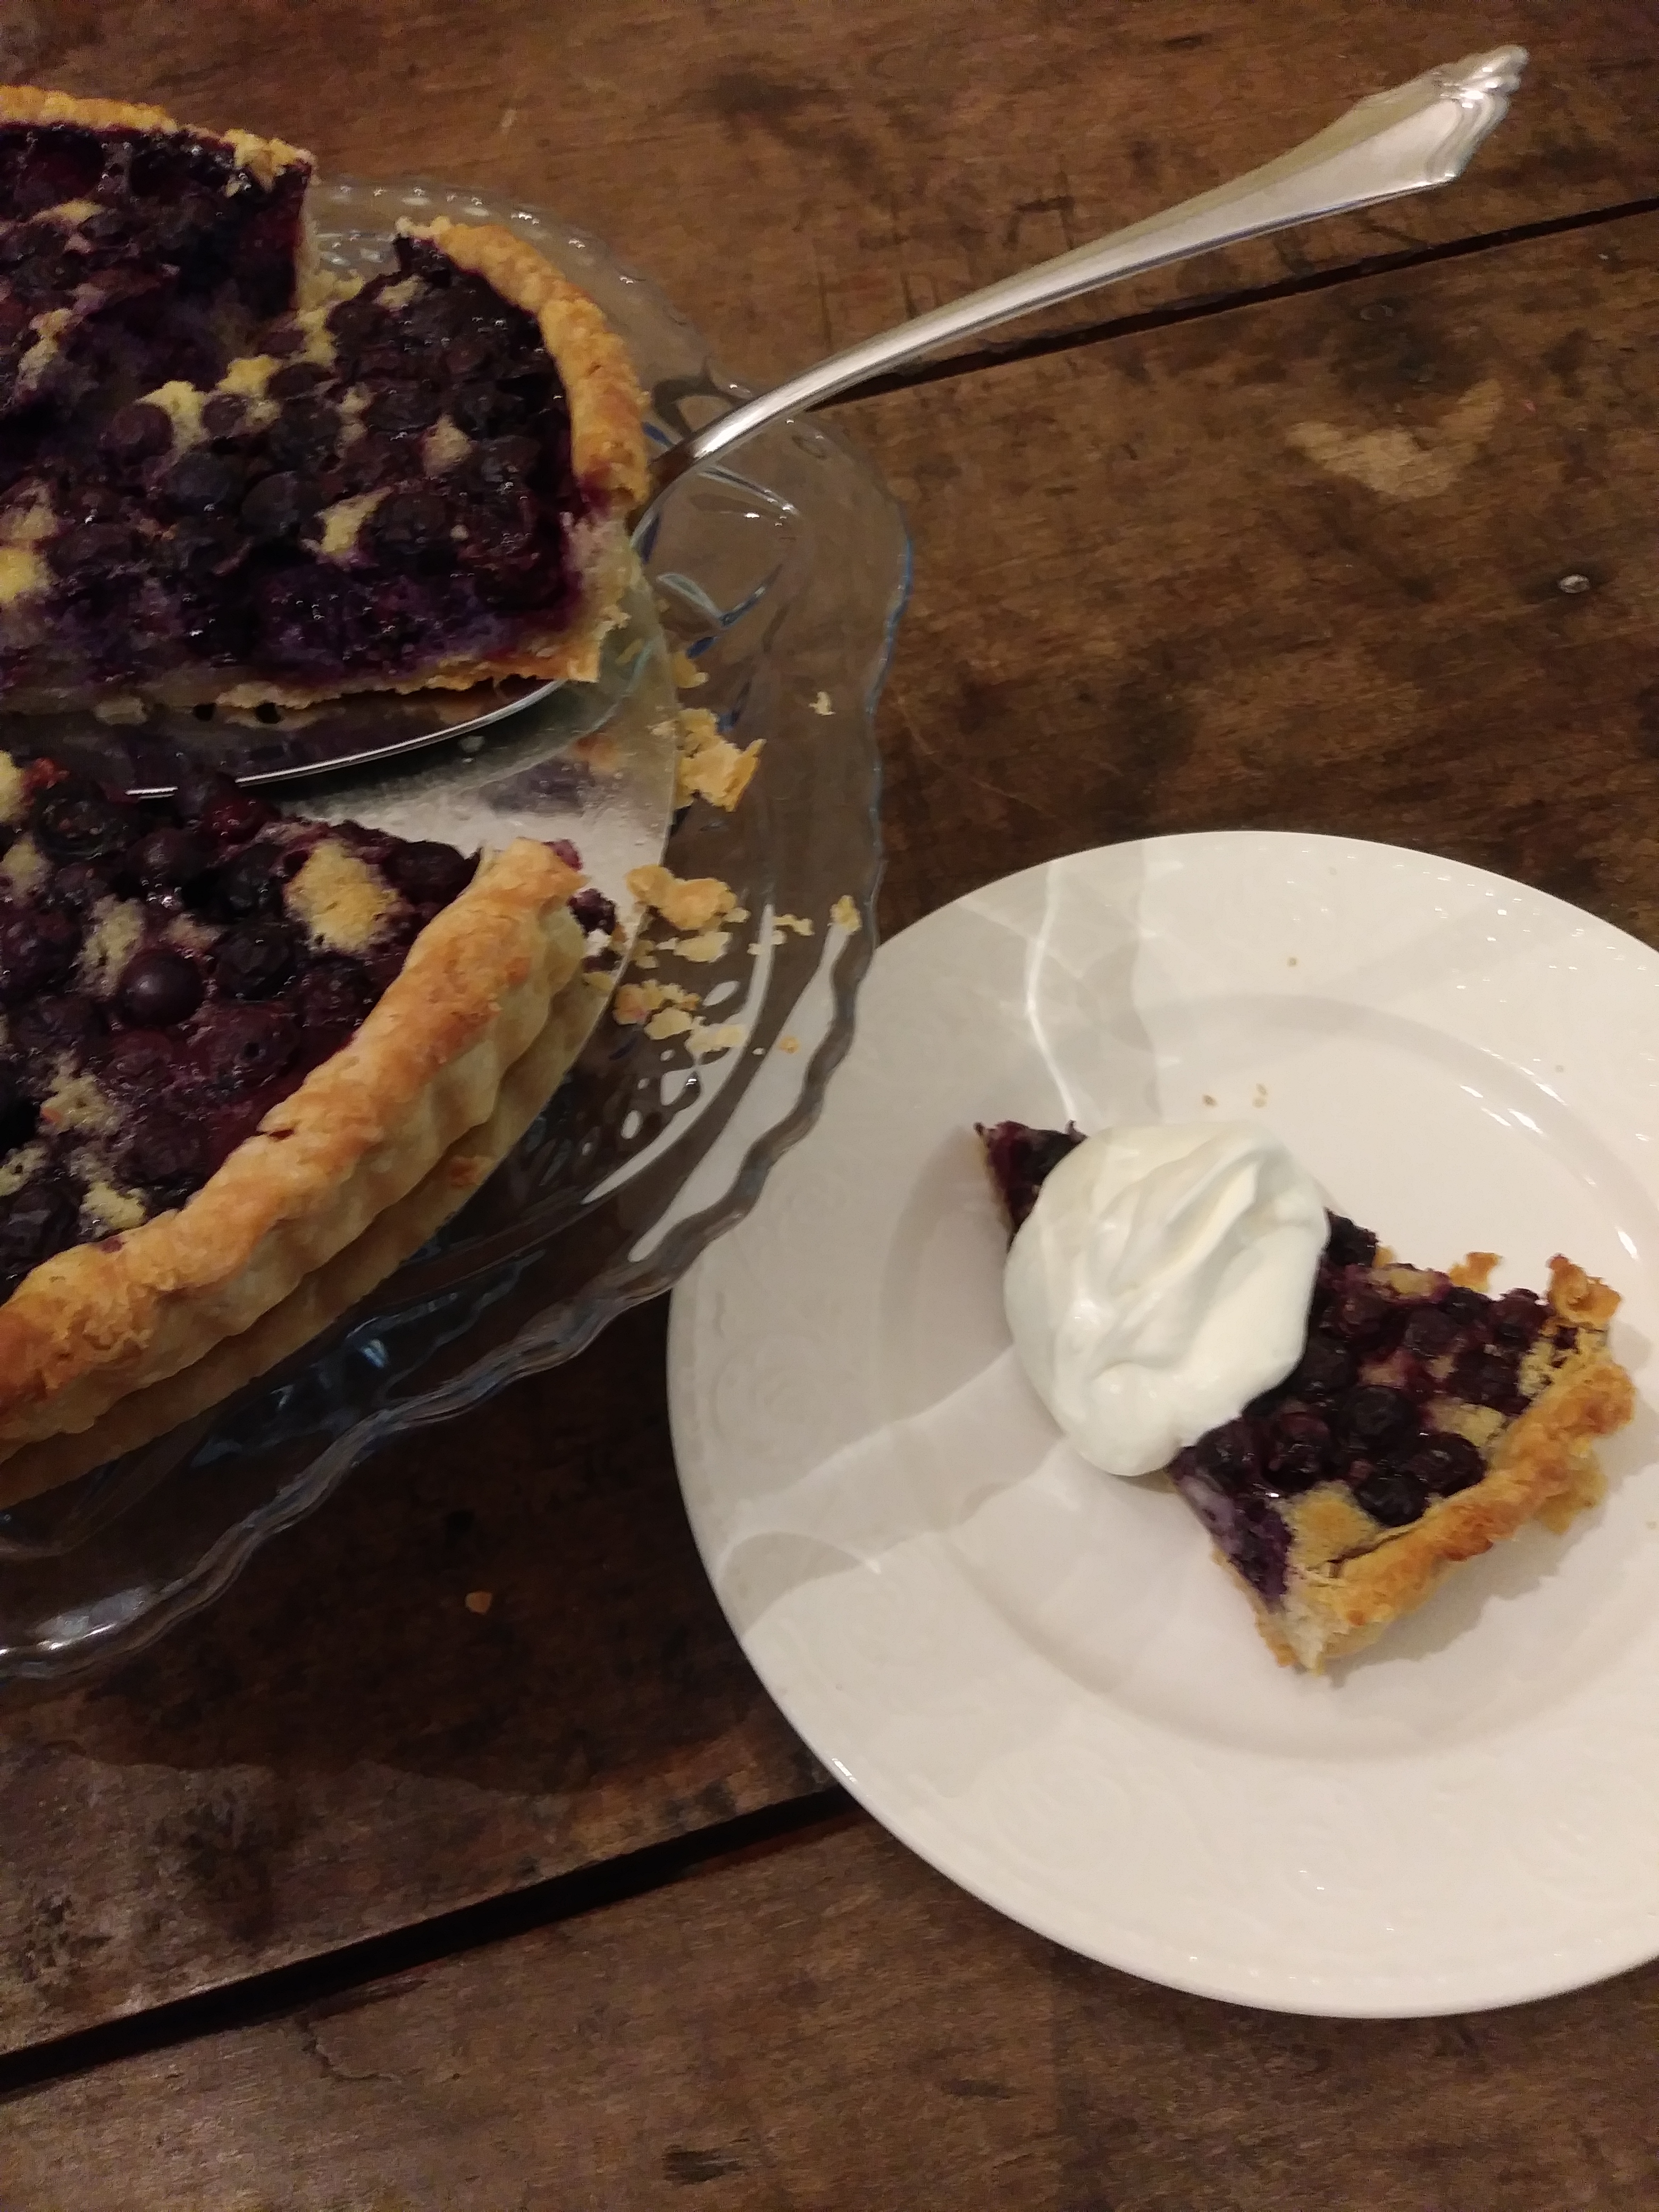
This recipe is so good that I’m posting it even though my pictures aren’t perfect.  It’s like no other apple cake I’ve experienced.  The emphasis is on the apples with just enough airy cake batter to envelope them and bring out their best features.  The cake is light and soft with a crisp top, and the apples are soft and succulent.  I LOVE the almond flavoring with the apples, it’s perfect.

Apple Sharlotka (Russian Apple Cake)

recipe from Food and Wine magazine by Matt Danko Click through for the original recipe and a video!

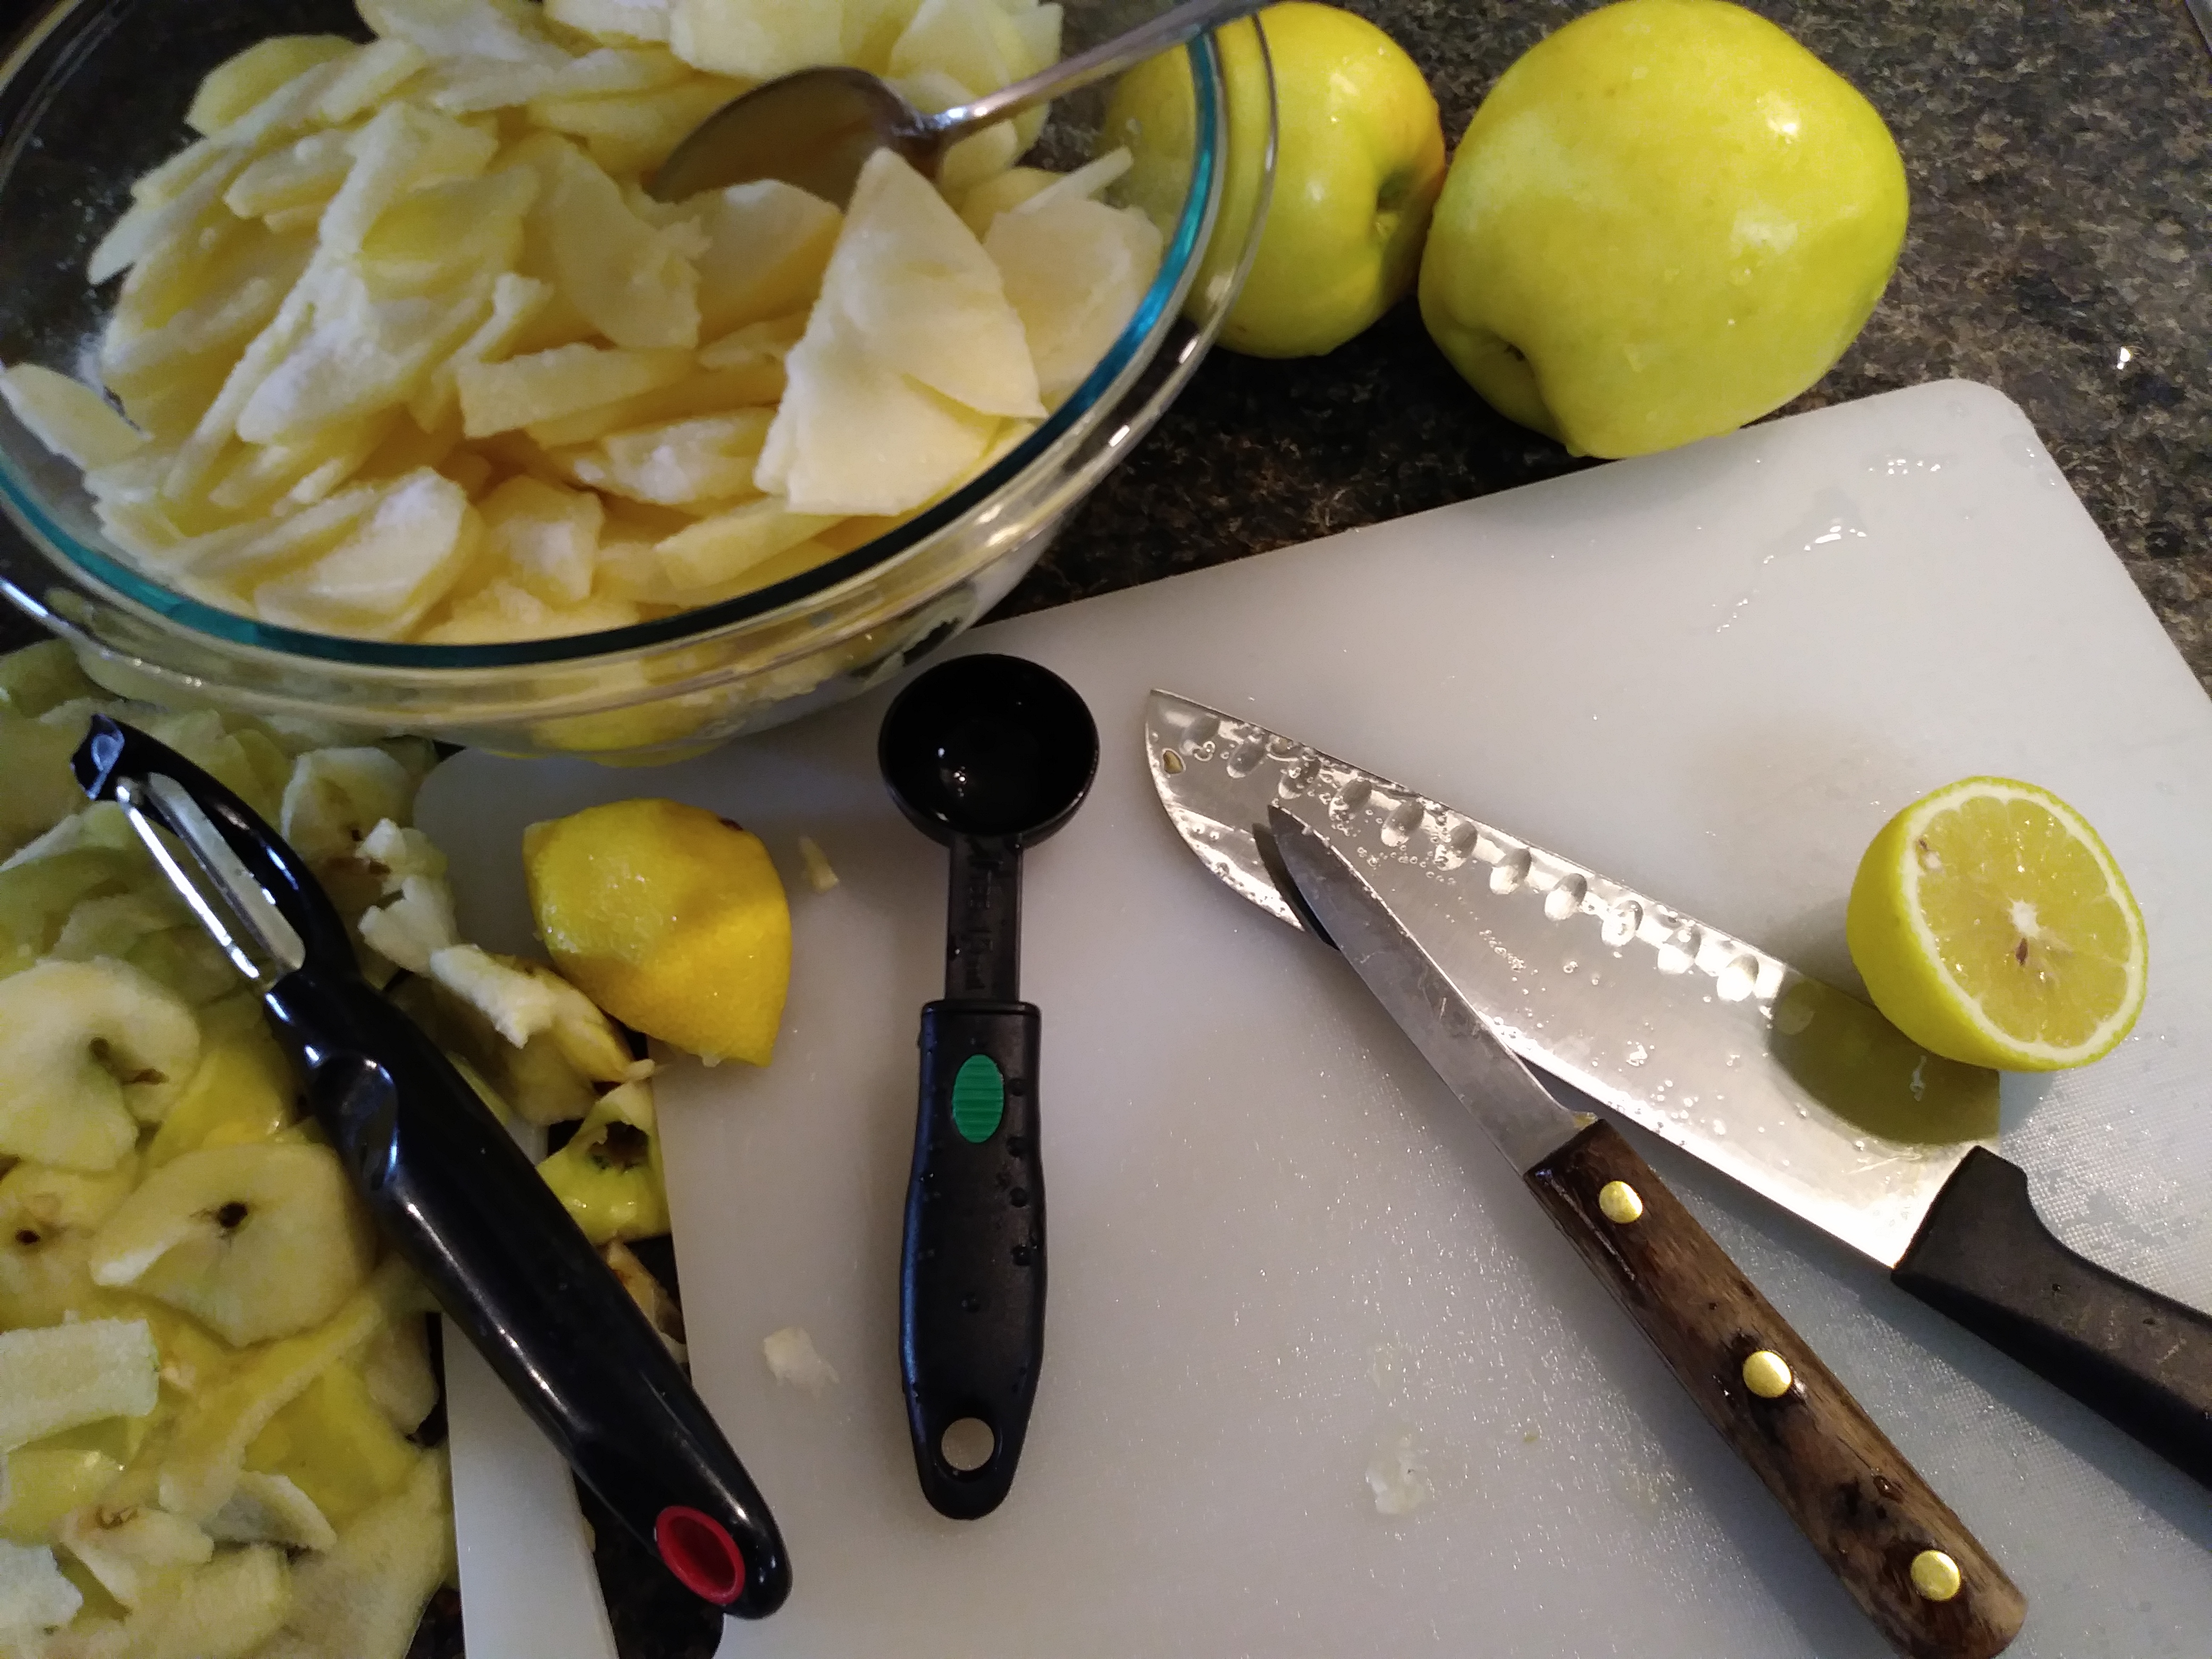
4 Granny Smith apples ( I used Yellow Delicious this time) – peeled, cored, and thinly sliced

1 Tbsp fresh lemon juice

1 cup sugar

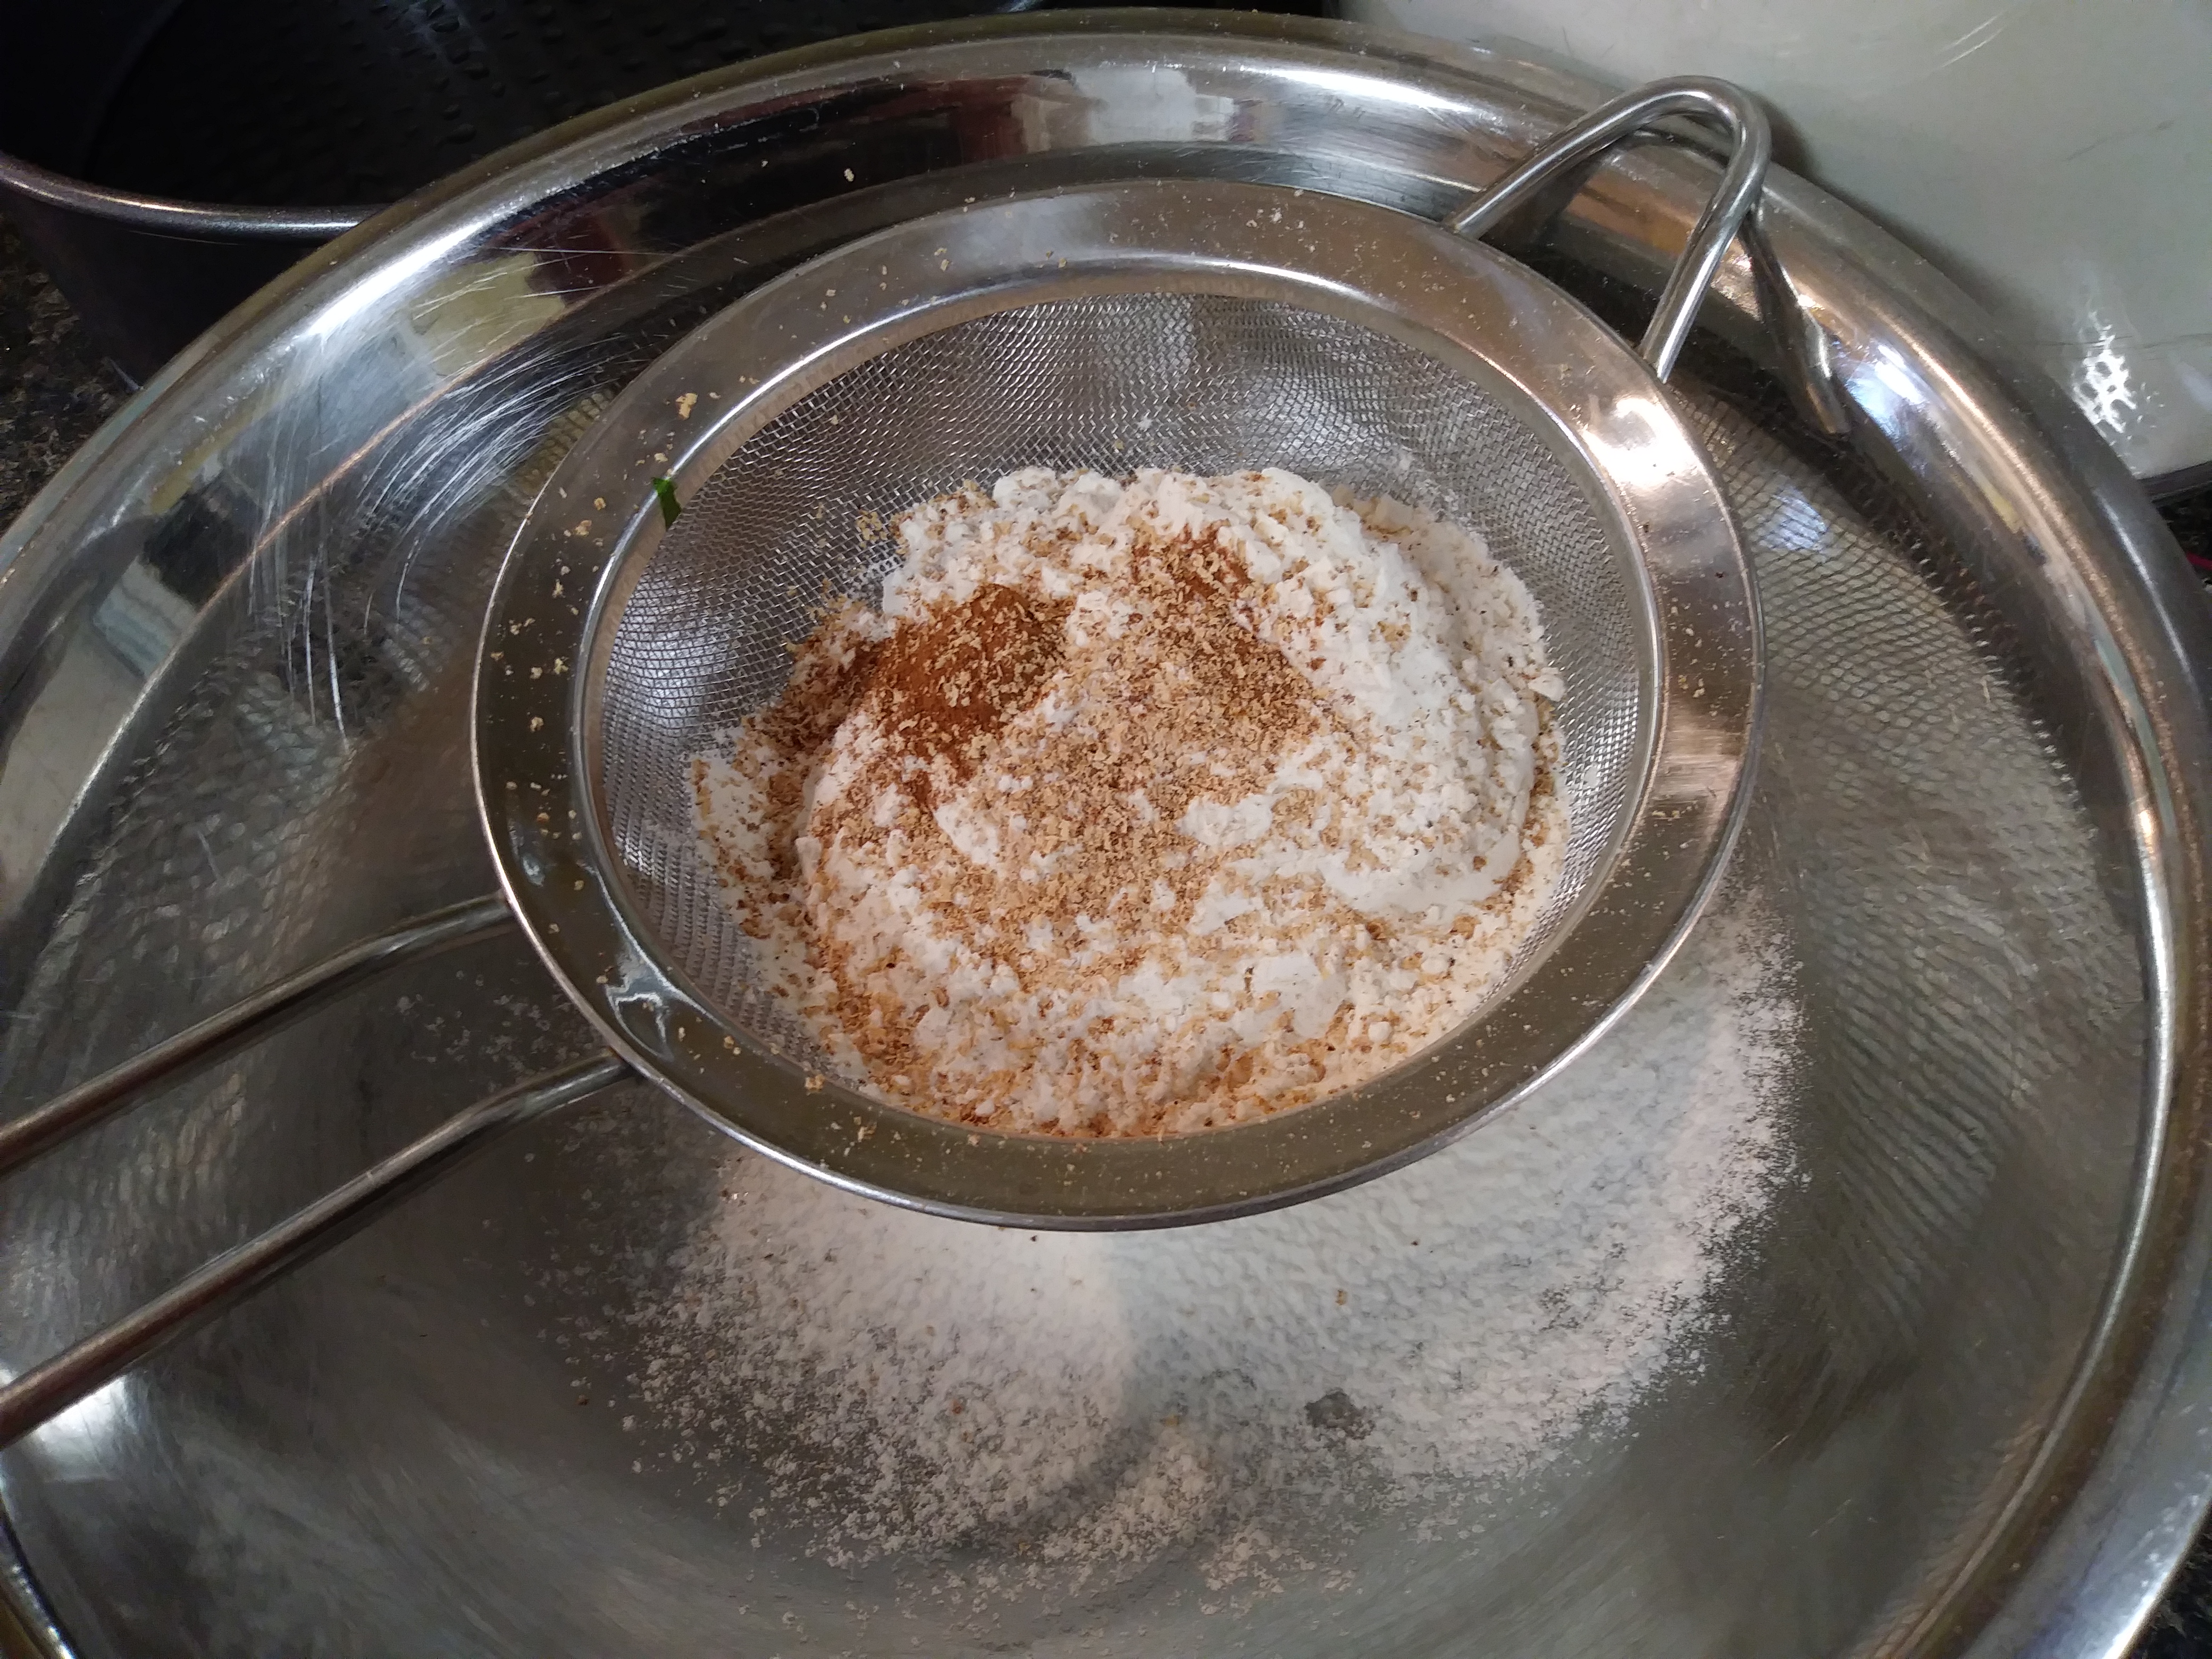
3/4 cup plus 2 Tbsp all purpose flour

1/4 tsp cinnamon

1/4 tsp freshly grated nutmeg

pinch of salt

3 large eggs

1/2 tsp pure almond extract

confectioner’s sugar, for dusting

  • Preheat the oven to 350°. Grease the bottom and side of an 8-inch springform pan.
  • In a large bowl, toss the apples with the lemon juice and 2 tablespoons of the sugar and let stand for 15 minutes.

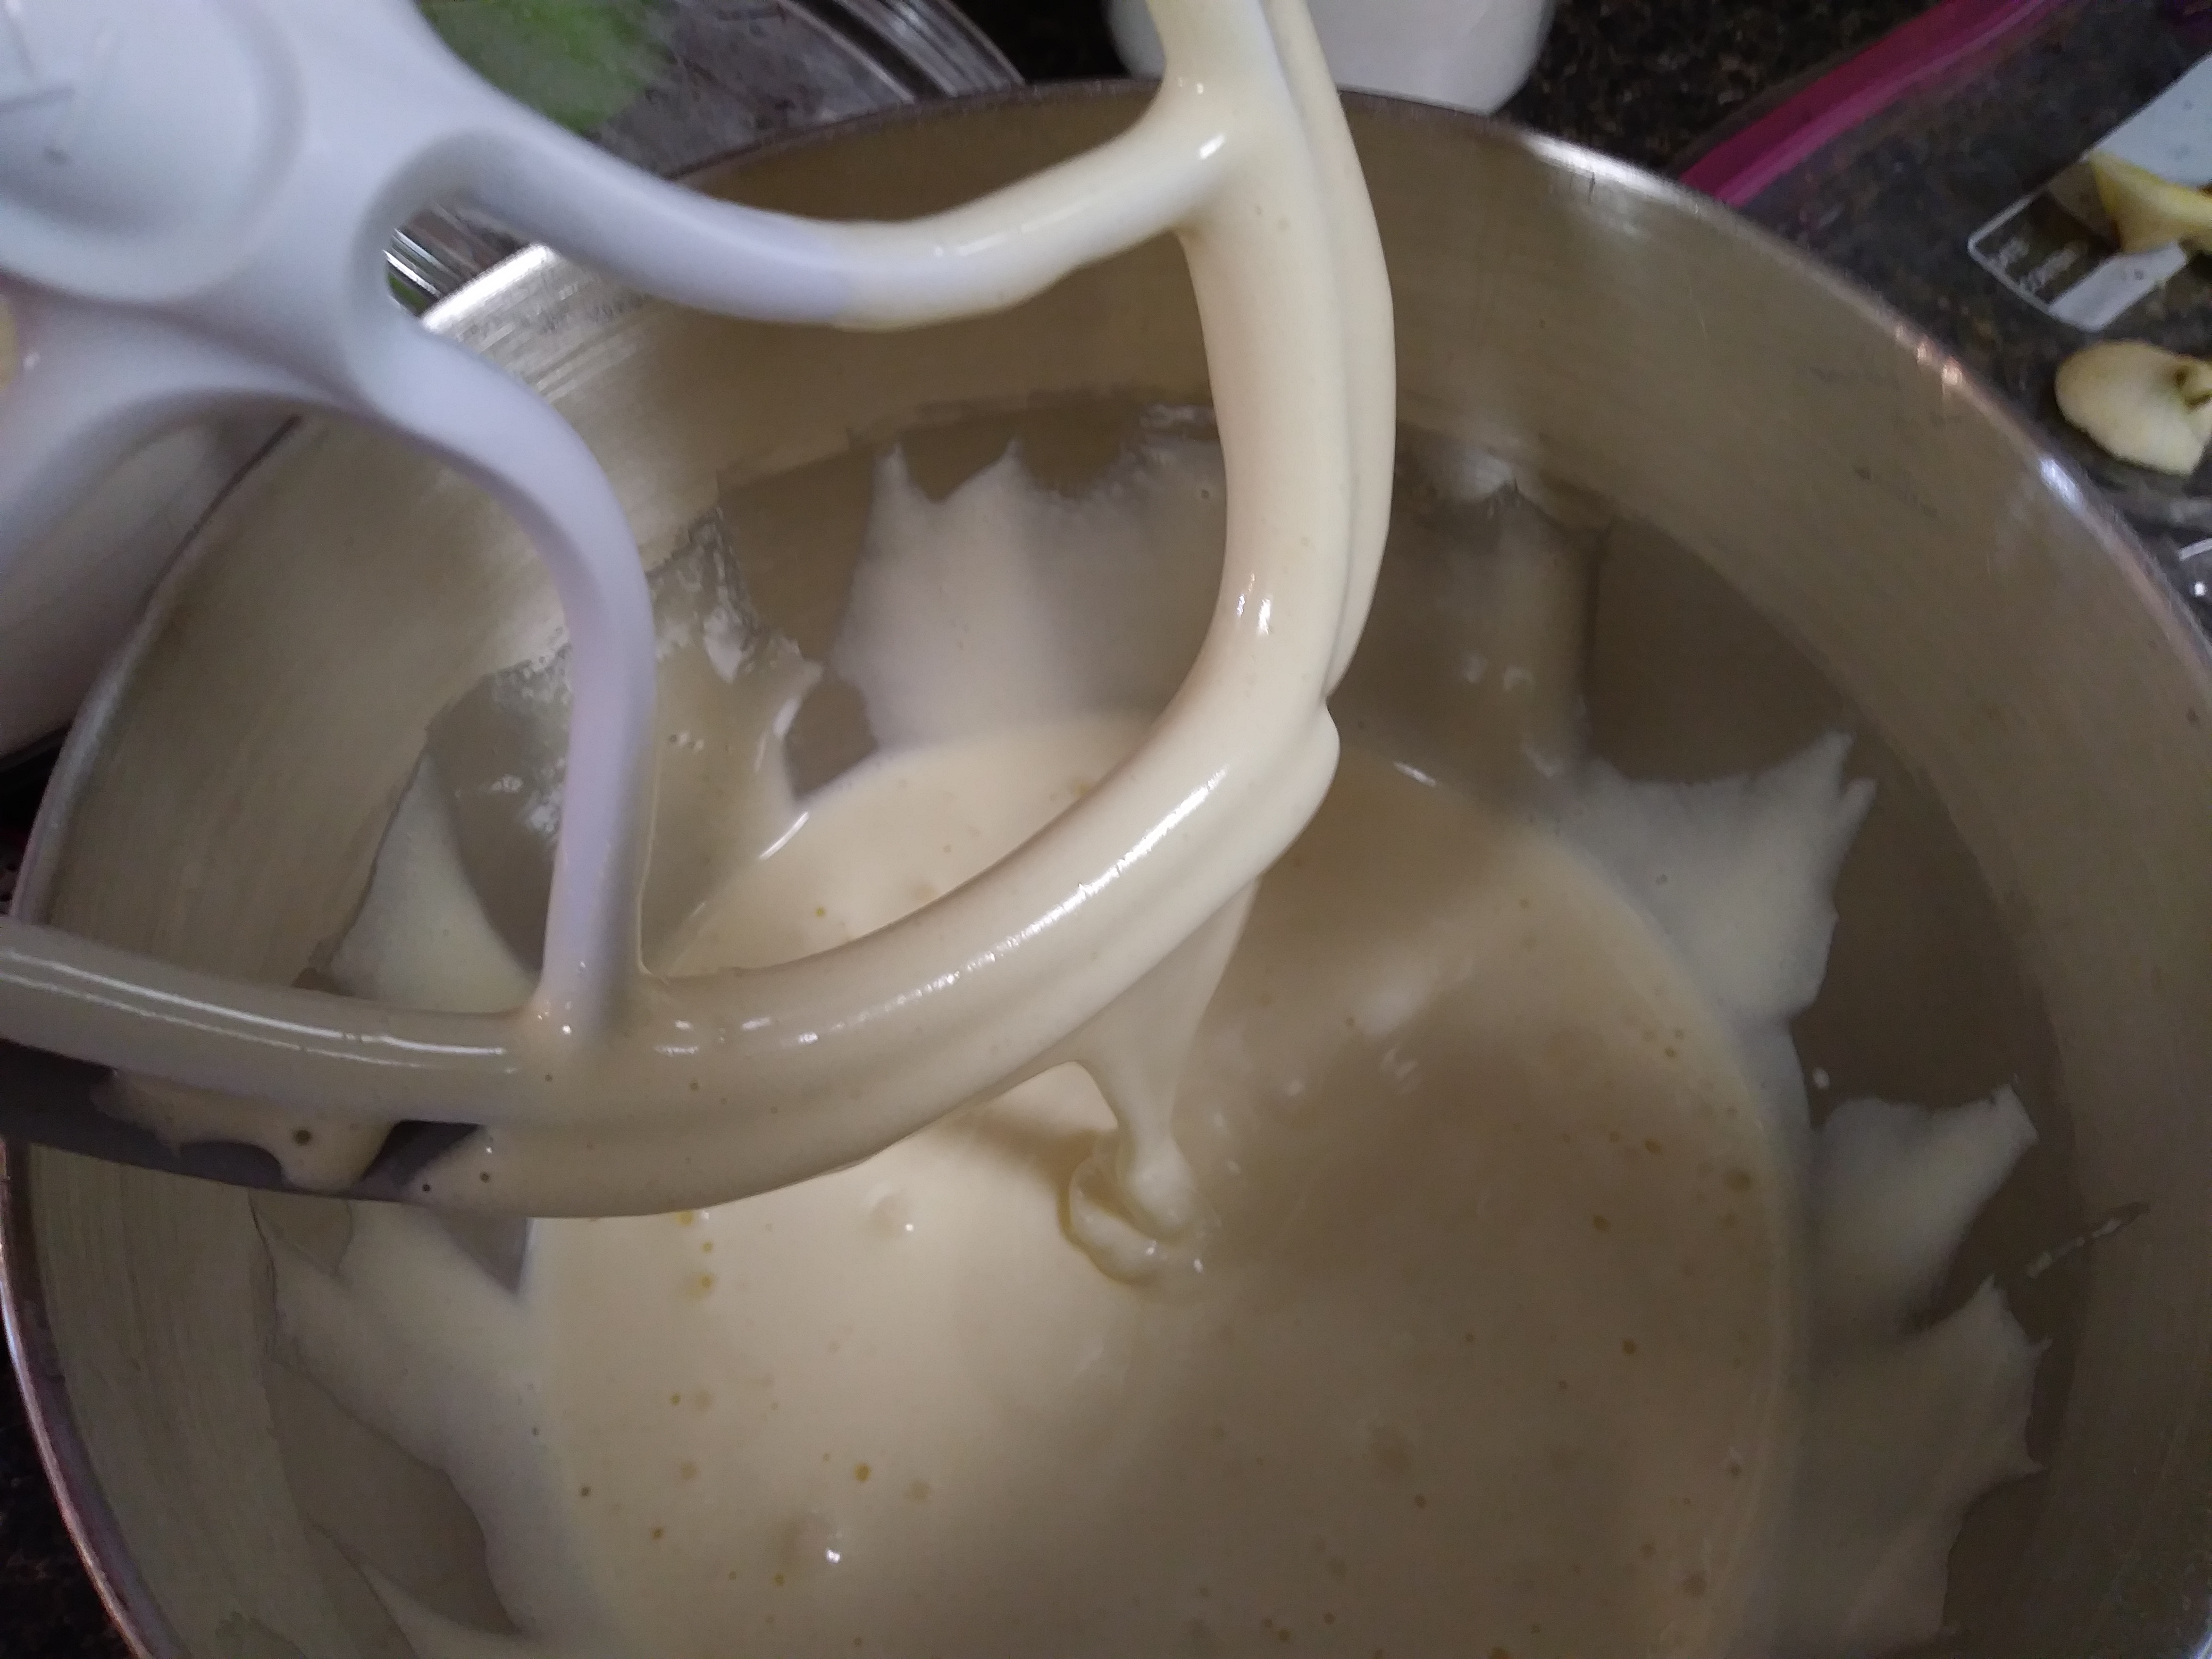
  • Meanwhile, in a small bowl, whisk the flour with the cinnamon, nutmeg and salt. In a medium bowl, using an electric mixer, beat the eggs with the almond extract and the remaining 3/4 cup plus 2 tablespoons sugar at medium-high speed until thick and pale yellow and a ribbon forms when the beaters are lifted, 8 to 10 minutes. Gently fold in the dry ingredients just until incorporated.

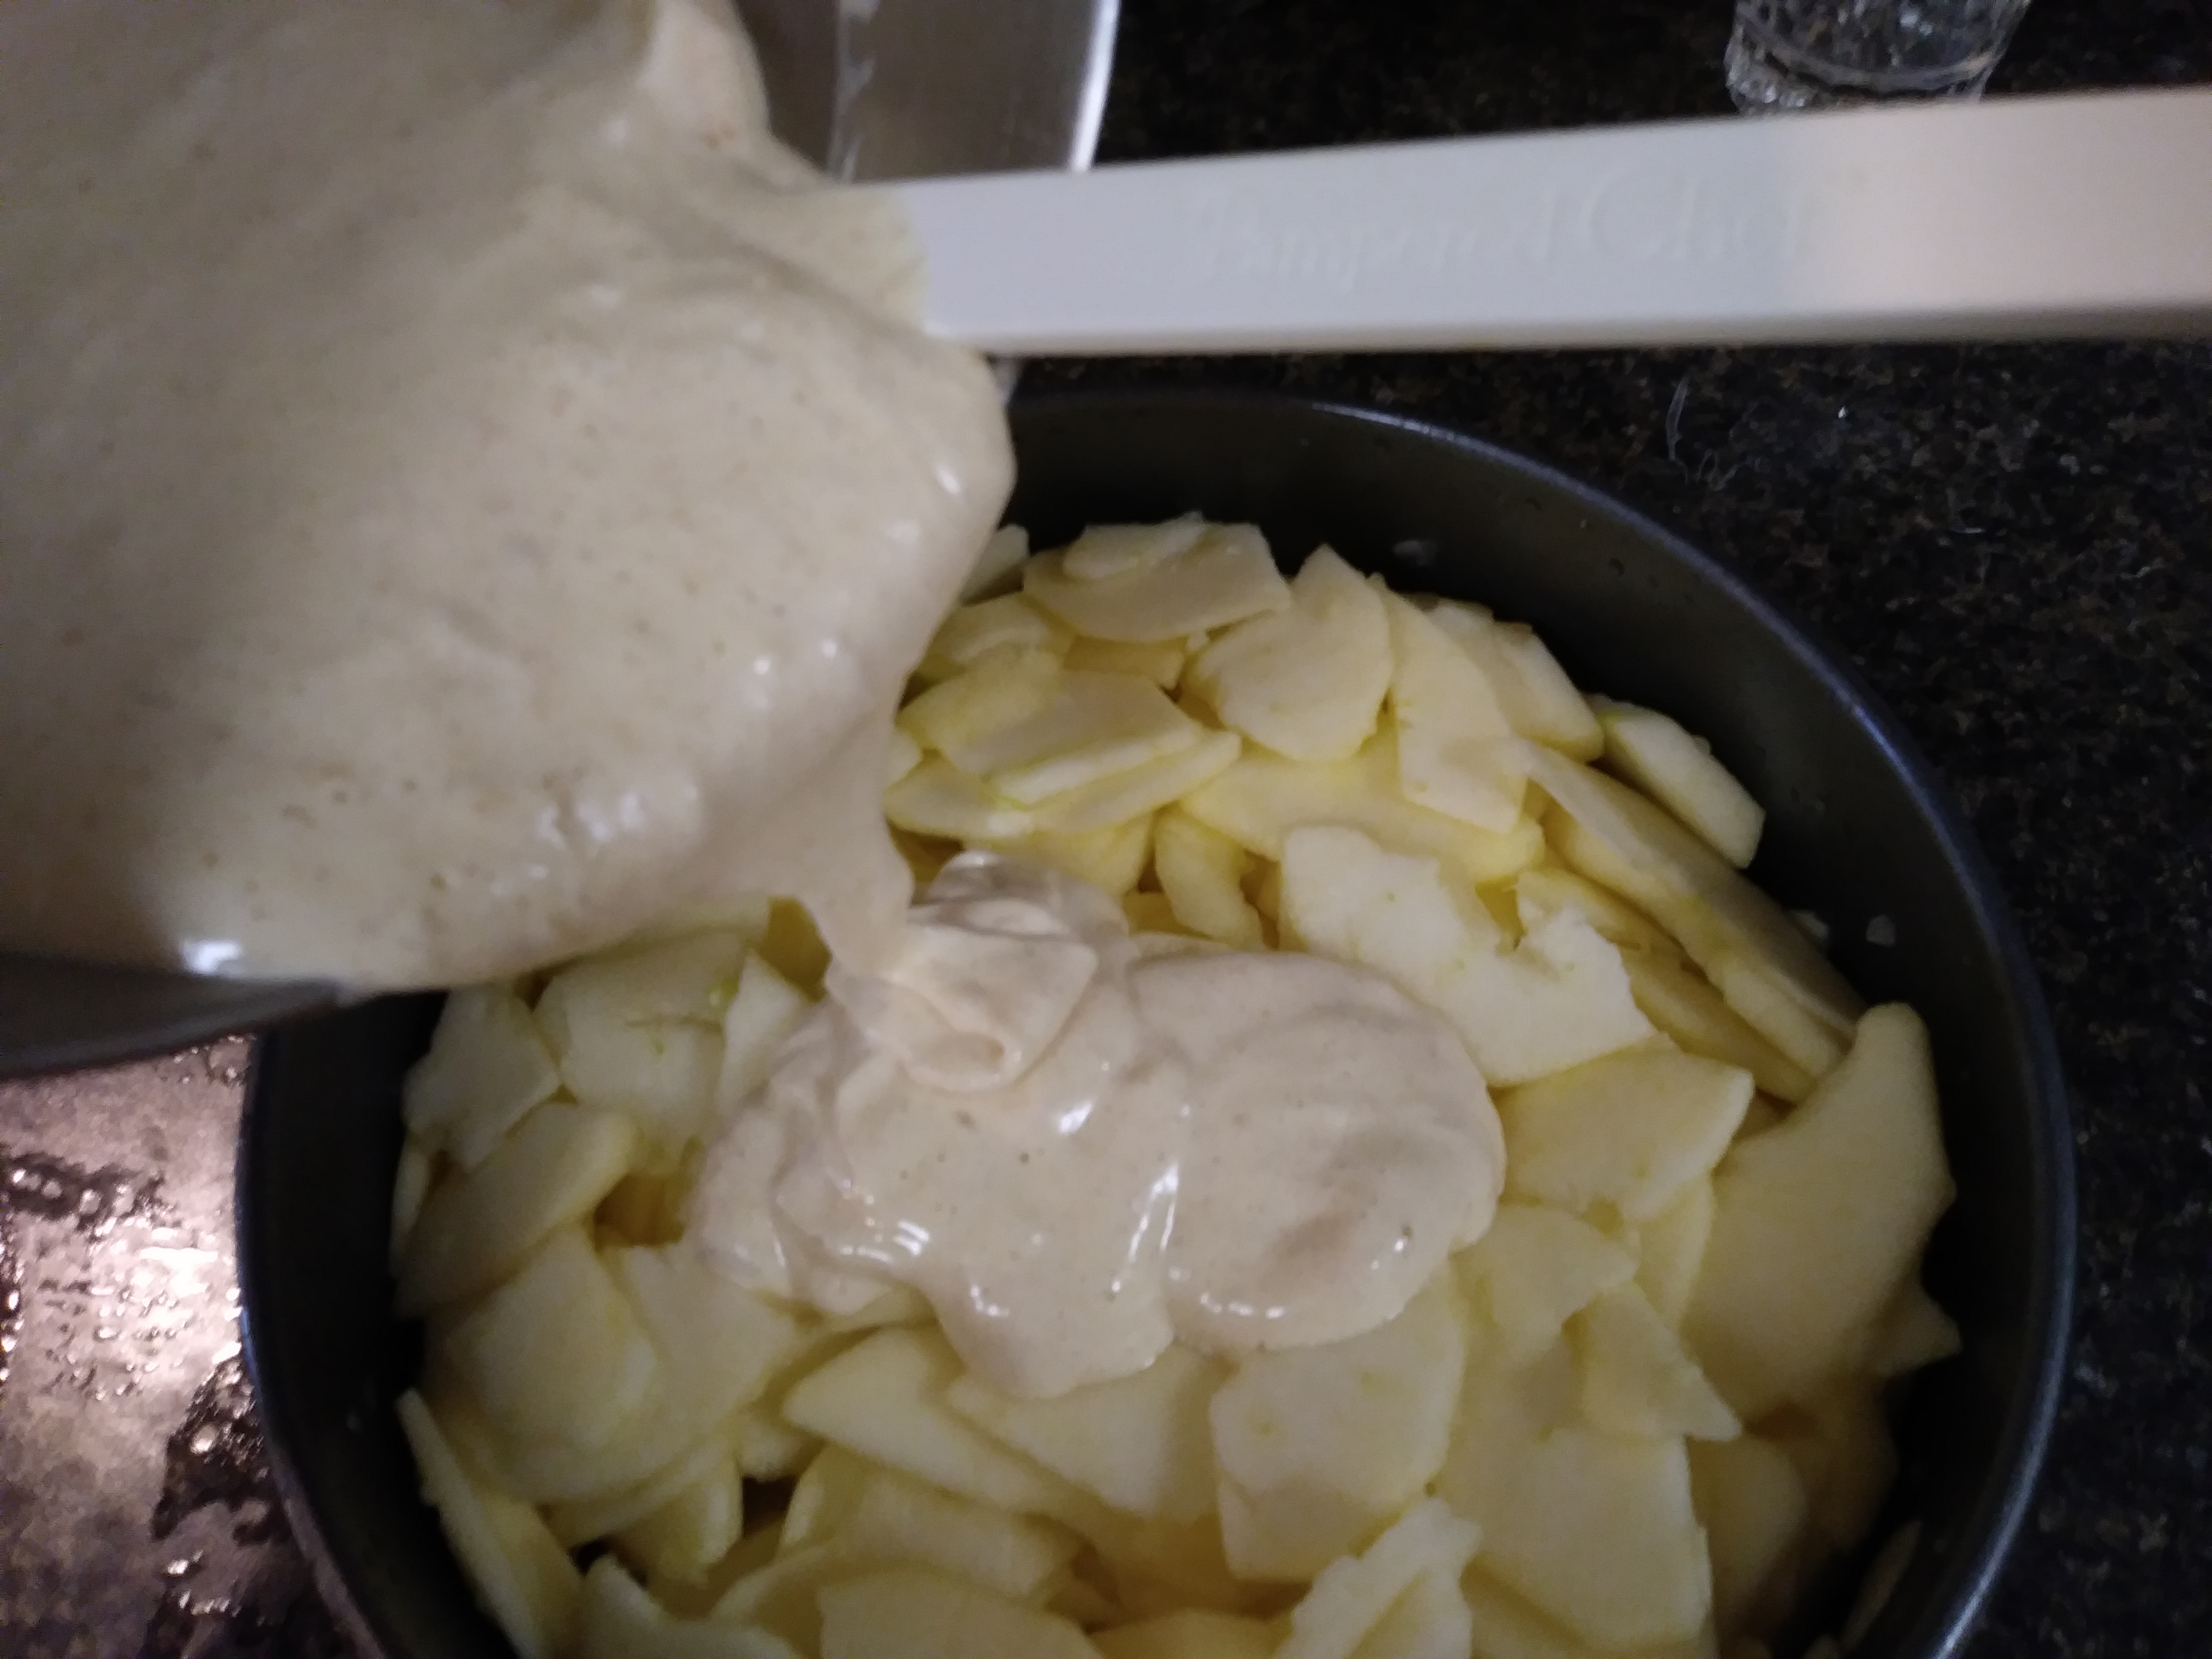
  • Spread the apples in the prepared pan in an even layer, then pour the batter evenly over them. Let stand for 5 minutes to allow the batter to sink in a little.
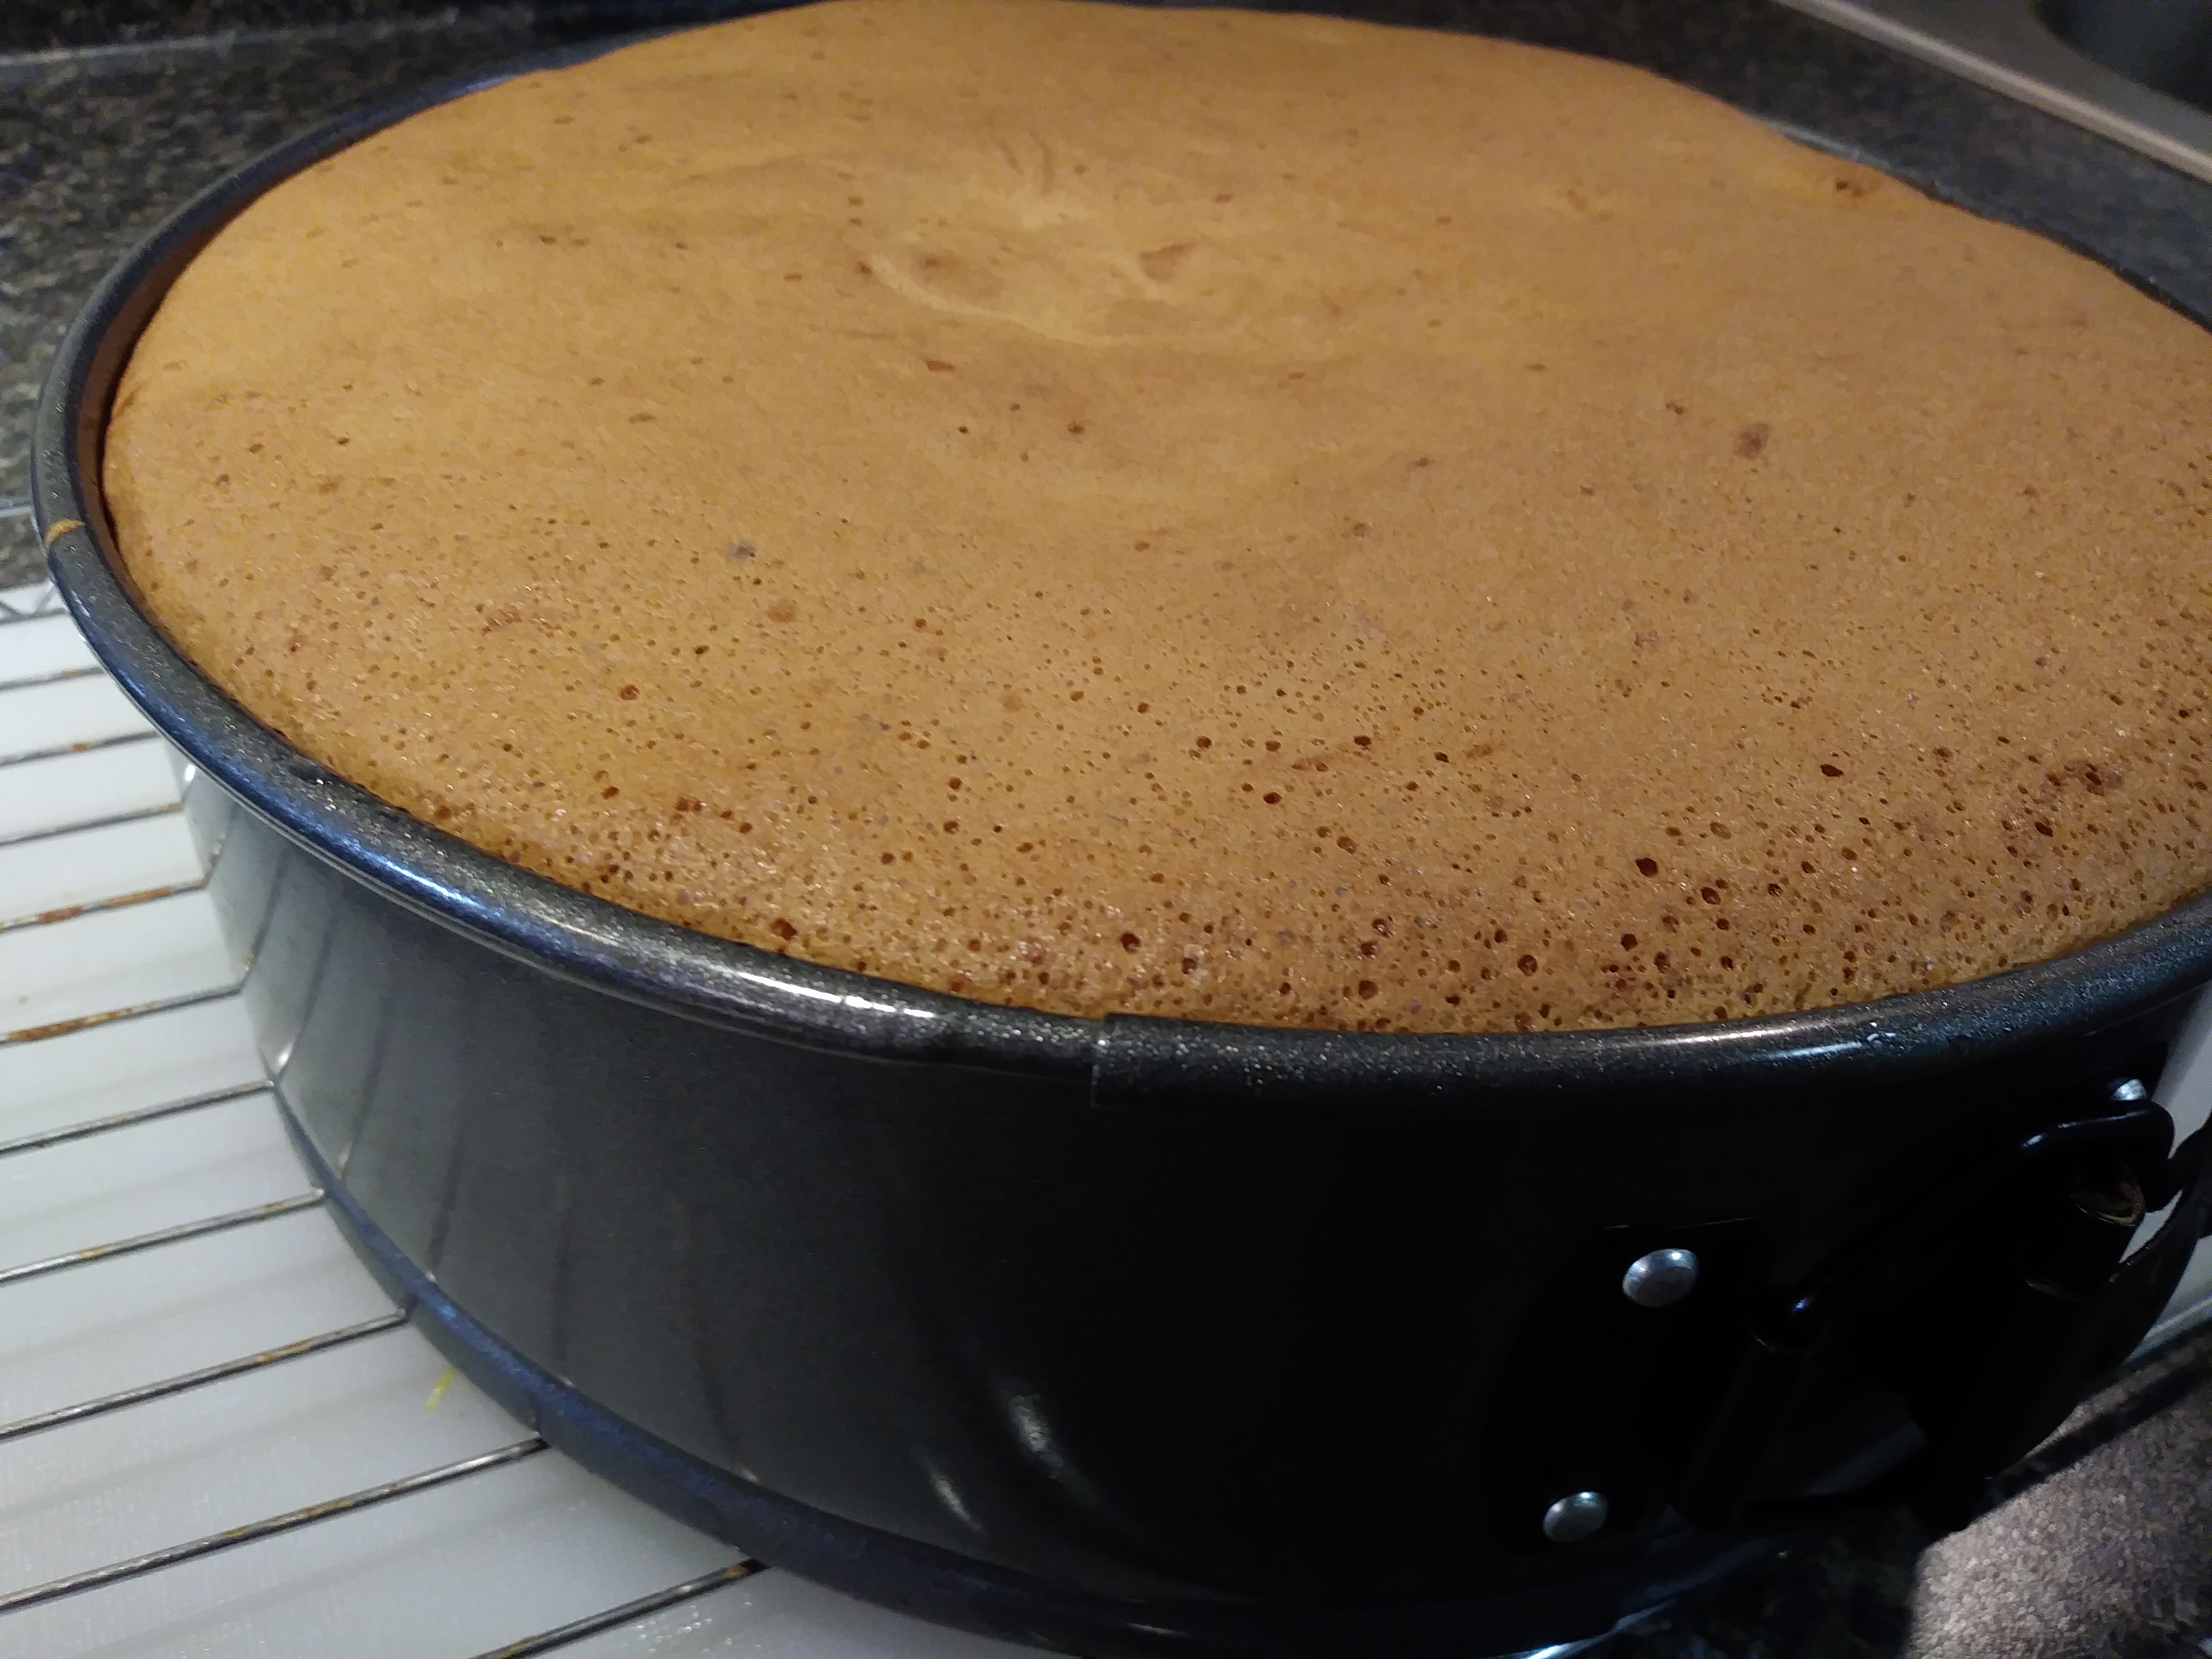
  • Bake the sharlotka for about 1 hour, until it is golden and crisp on top and a cake tester inserted in the center comes out clean. Transfer to a rack and let rest for 15 minutes. Unmold and transfer to a serving platter. Dust with confectioners’ sugar and serve warm.


Fruit and Oatmeal Bars

When I bake for my son, I’m always thinking of how I can boost the nutrition and also create something that feels like a delicious treat.  These fruit bars are sweet and rich and pack a decent amount of nutrition too.  There are some oats, whole wheat flour, and  almond meal and egg for protein as well as fruit!  This is good enough for breakfast and sweet enough for dessert.  I also love the simplicity of a recipe that does not require a separate mixture for the crust and topping.

Fruit and Oatmeal Bars

1 cup rolled oats

1/4 cup whole wheat flour

1/2 cup all purpose flour

1/4 cup almond flour

1/3 cup brown sugar

1 teaspoon salt

1 stick butter – cut into cubes

1 teaspoon vanilla

1 egg

1 Tablespoon cold water

For the filling:

3/4 cups fruit preserves

1/2 cup fruit

1/2 lemon or lime, juiced

Preheat the oven to 375 and prepare 8 inch square pan for baking.

Mix 3/4 cup oats, all the flour, sugar, and salt.  Add the butter and mix with a pastry cutter, fork, or by squeezing with the fingertips.  Work this mixture until the butter is evenly distributed.  Mix the egg, water and vanilla in a small bowl, then add to the dry ingredients and mix until it will stick together in clumps and everything is moistened.  Divide this mixture in half.

Press half the dough into the pan, making it as even as possible.  Bake this crust for 12 minutes.

Meanwhile, add the remaining 1/4 cup oats to the remaining dough.  Stir together the fruit, preserves and lemon juice in a separate bowl.

Remove the crust from the oven and spread the fruit mixture on top.  Pinch the remaining dough between your hands in clumps to flatten it out and place all over the fruit filling.

Place in 375 degree oven and turn down to 350.  Bake for 18-20 minutes.  Serve warm or at room temperature.

I used blueberries and strawberry jam.  These bars are super yummy, or as my husband would say, freakin’ good!!

Blueberry Frangipane Tart

I really believe that if you’re going to become excellent at anything, from baking to baseball, you’ve got to be willing to try new things and make some mistakes.  My success and confidence in the kitchen has come from years of practice and experience and yes, I’ve had my share of failures.  As Einstein said, ‘anyone who has never made a mistake has never tried anything new.’  This is how we learn.

I had wonderful blueberries.  I had pie crust already made.  I knew it would be tricky to combine them with frangipane in a tart the way I wanted to, but decided to proceed nonetheless.  Frangipane is a sweet filling made from almonds, butter and eggs, and it’s one of my favorite treats.  It must be baked, and it really needs to be exposed to the heat (not buried deep in a pie) in order to puff up and brown a little.  I did everything right in this recipe, almost.  I made sure to blind bake my crust.

I didn’t cover the frangipane completely with blueberries.  I baked until bubbly in the center.  However,…. it needed 5 more minutes!  The edges were perfect with crisp and flaky crust, but the center was not.

If I make this again, I think I’ll put the frangipane on top of the blueberries and let the berries peek through instead of vice – versa.  At any rate, my husband LOVED this tart and said the amount of sweetness was just right.  Served with lightly sweetened whipped cream, it really was good despite it’s imperfection.

Blueberry Frangipane Tart

Adapted from The New York Times Cooking

1 pie crust –  Here’s an old post with a recipe you can use.

2 cups fresh or frozen blueberries

1/2 cup ground almonds (almond flour)

2 teaspoons all purpose flour

1/4 cup sugar

1/2 stick butter

1 egg

1/2 teaspoon almond extract

  • Roll out the dough, chill and blind bake.  For more information about blind baking click here.
  • Mix the almond flour, all purpose flour, sugar, almond extract, egg and butter really well.  Spread into the pre-baked shell.
  • Place the blueberries on top, making sure to leave some frangipane filling peaking through.
  • Bake at 375 F for 35 to 40 minutes on the bottom rack of the oven.  If the crust becomes too dark around the edges, cover with a ring of foil and continue baking.
  • Allow to cool at least an hour before slicing.
  • YUM!

Here’s an old post about the first time I made a Pear Frangipane Tart.


Blackberry Lime Walkaway

This is a beautiful bread filled with cream cheese, jam and fresh fruit.  The recipe is much easier than it looks, and it’s super delicious. Nothing beats blackberries in the summertime, so I walked along the pasture fence picking until I had more than enough for a baking project.  I used raspberry jam and flavored the cream cheese with lime zest and juice.

If Walkaway seems like an odd name for a cream cheese and fruit filled bread, click through to The Italian Dish blog and read about its origins.  I’ve made it several times over the years and am always pleasantly surprised at how simple and adaptable it is.  I made a few changes to the recipe this time, leaving the dough a bit leaner and healthier while bumping up the cream cheese and fruit.

Blackberry Lime Walkaway

Adapted from The Italian Dish

For the dough:

1/3 cup milk

3/4 cup water

3 Tablespoons butter – melted

3 Tablespoons sugar

1/2 teaspoon salt

3 cups all purpose flour

1/2 cup whole wheat flour

2 teaspoons active dry yeast

For the filling:

6 oz cream cheese

zest and juice of 1 lime or lemon (I used 1/2 lemon and 1/2 lime b/c that’s what was in my fridge)

2 teaspoons sugar

1/2 cup raspberry jam

3/4 cup fresh blackberries

I make the dough in my bread machine because I can walk away from it and let the machine slowing mix and knead everything.  However, you can use a stand mixer.  Place the 1/2 cup whole wheat flour, 1 cup flour, sugar, salt and yeast in the mixing bowl and attach the dough hook.  Mix until combined, then gradually add the liquids and butter.  Add the remaining flour until the dough clings to the hook and cleans the sides of the bowl.  Add just enough to form a soft ball – you may have to add a little less or a little more flour.  Knead for about 5 minutes.  Place in a greased bowl and cover.  Let rise until doubled in bulk, about 45 min to an hour.

Line a baking sheet with parchment paper and add just a teaspoon of oil to spread around with your hands.  This will help with any sticky issues in the next step.  When the dough is ready, punch it down and place on the oiled paper with your oiled hands.  Spread the dough to fill the pan completely and evenly.  I did this just with my hands, but you could use a rolling pin.  Mix the cream cheese, sugar, lime juice and zest in a small bowl.  Spread the cream cheese mixture down the middle of the dough in about a 4 inch strip, leaving an inch of dough at both ends.  Next, gently spread on the jam and then top with the fresh blackberries.  To  make the beautiful folded top, use a sharp paring knife to cut diagonal strips down the sides of the dough.  Make two cuts on each end to make the end flaps.  Fold the short end flaps over the filling and then start folding the strips over, alternating from side to side.  Trim away any excess dough when you’re done.  Cover lightly and let rise for about 40 minutes.

Bake at 375 for about 25- 30 minutes, until golden brown.  Serve for breakfast, second breakfast, elevensies, or a snack!  The zing of lime zest and punch of raspberry jam are fantastic.


Macarons

French Macarons are one of my son’s absolute favorite treats.  Whenever we travel to a ‘big city’ and visit a bakery he always begs for one of the cute, brightly colored little sandwich cookies.  I’ve read quite a bit about these and how difficult they are to make, so I never bothered to try at home until last week.  Fortunately for me, I have been practicing all the necessary skills to make macarons for years so my first two batches turned out great!

After realizing that I do not have a cookbook with this recipe (!??), I visited my most trusted blogger for French desserts,  David Lebovitz.  He offered great advice, links, and a well tested recipe for chocolate macarons.  After success with chocolate I tried Martha Stewarts recipe for plain almond flavor.

I was nervous about how these delicate cookies would come together, so I pulled out my baking scale for accuracy and set to work.  You can click through for the recipes I used, but I will share a few things I learned.  First of all, it’s important to pulverize the almonds into a fine dust with the confectioners sugar.  I used my Nutri Bullet for this and it worked great.  Secondly, my scale came in very handy.  It’s difficult to get accurate measurements without weighing ingredients.  The more I practice baking with a scale, the easier it becomes.  It’s very satisfying to achieve such precision.  Third, making macarons is all about whipping the egg whites and your folding technique.  If you’re not comfortable separating eggs, making meringue, and folding delicate batters, then this might be a frustrating recipe to attempt.  A good tip which I didn’t come across until after baking is that the batter should be like lava; on reflection mine was a bit too stiff and that’s why the tops were not perfectly flat and smooth.  I did not aim for perfectly uniform size with my cookies and instead went free hand with the piping bag.  I made smallish macarons and thought they were just the right size for sharing and having more than one.  Lastly, please keep an eye on the oven as they bake.  Both my chocolate and plain macarons baked more quickly than I anticipated and I came close to burning them!

I’ve mixed up the photos from the plain and chocolate batches, but you can get an idea of the process.  I was pleased that my macarons achieved that cute little ‘foot’ and a shiny top.  You can also see the sort of belly button lumps on top of most of my cookies which as I learned was a result of slightly stiff batter.  I attempted to smooth the tops of some of the plain cookies with a wet finger, but got overzealous and ended up with some ugly tops as seen below.  They still tasted wonderful!  I filled the chocolates with raspberry jam and the plain almonds with vanilla buttercream.